Github HW Submission Instructions
Before you start
Step 1: Ensure you have a github folder
Ensure that you have a folder named gitHub in the FEWD folder . You will be using this folder to manage all of your work that lives in Github through the course. This folder only needs to be created once.
Step 2: Log into to your Github account
Ensure you are logged into your GitHub account on Github.com
Step 3: Log into your Github Desktop application
Ensure You have installed the Github Desktop Application on your computer and you have logged in the application using your GitHub username and password
Forking the Assignment Repository
Step 4: Navigate to the HW Repository on Github.com
The instructor will provide you with a link to the repository that houses the HW assignment on Github.com. Click on that link and you should be navigated to the repository page for the assignment located on Github.com.
Step 5: Fork the HW Repository to create a copy under your account
Next we will fork the repository that contains the homework assignment. Remember, forking a repository copies a repository and places it under your account.
Fork the repository by pressing the Fork button in the upper right hand corner:
If you have more than one Github account associated with your email address, you will be asked to pick one. I recommended that you select the account associated with your personal account (this is most likely listed first in the list).
Step 6: Confirm fork was successful
Confirm that the fork was successful by observing that a copy of the repository has been placed under your account.
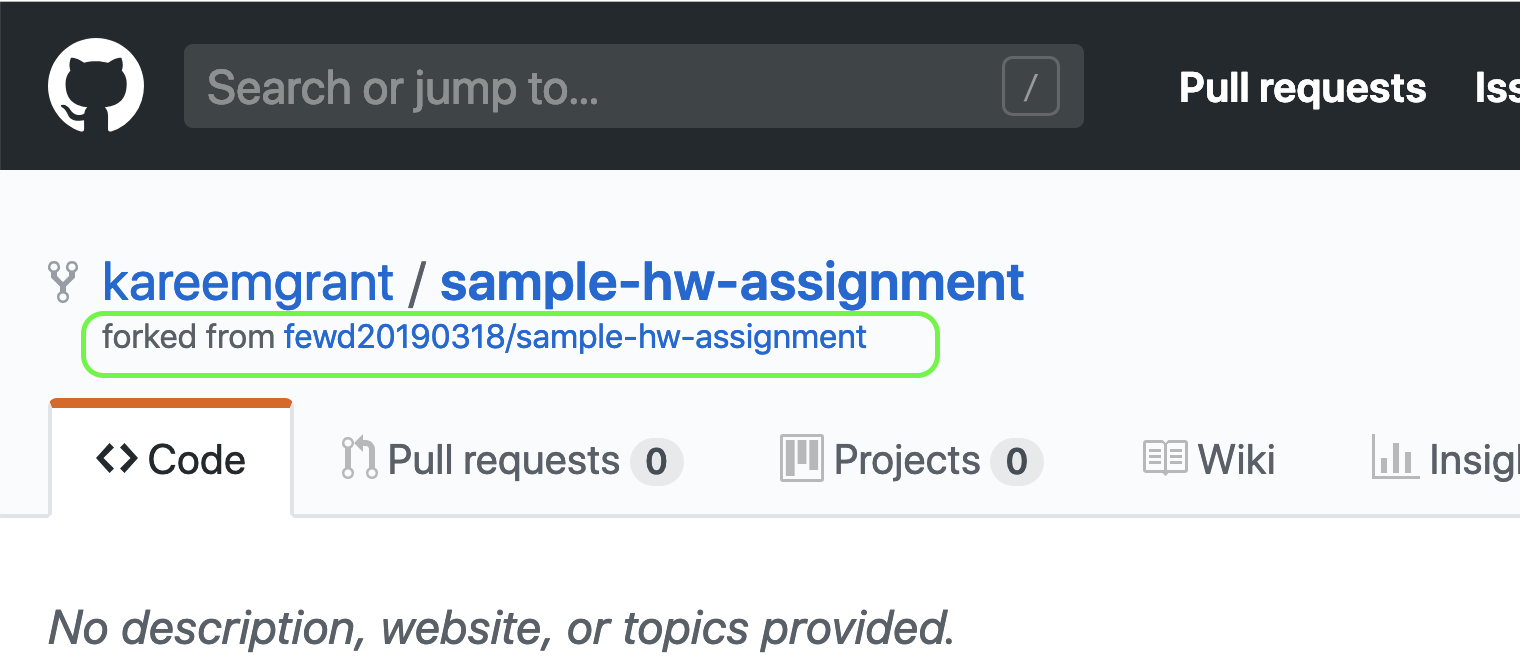
In the example above, the github account named kareemgrant successfully forked (i.e. copied) the HW assignment repository (sample-hw-assignment) that is owned by an account named fewd20190715
Cloning the forked repository
Congrats! You have forked the HW assignment repository to your account. However, you’re still not able to work on it, since the forked repository lives in the cloud on Github (another way to say this is that your repository is a remote repository) and you need a copy of the repository on your computer so you can work on it.
The process of creating a local copy (i.e. on your computer) of a remote repository is called cloning. Cloning also allows both local and remote copies of a repository to stay in sync.
We’ll be using the Github Desktop Application to clone our remote repositories. Make sure you have Github Desktop open on your computer. Also make sure you are signed in.
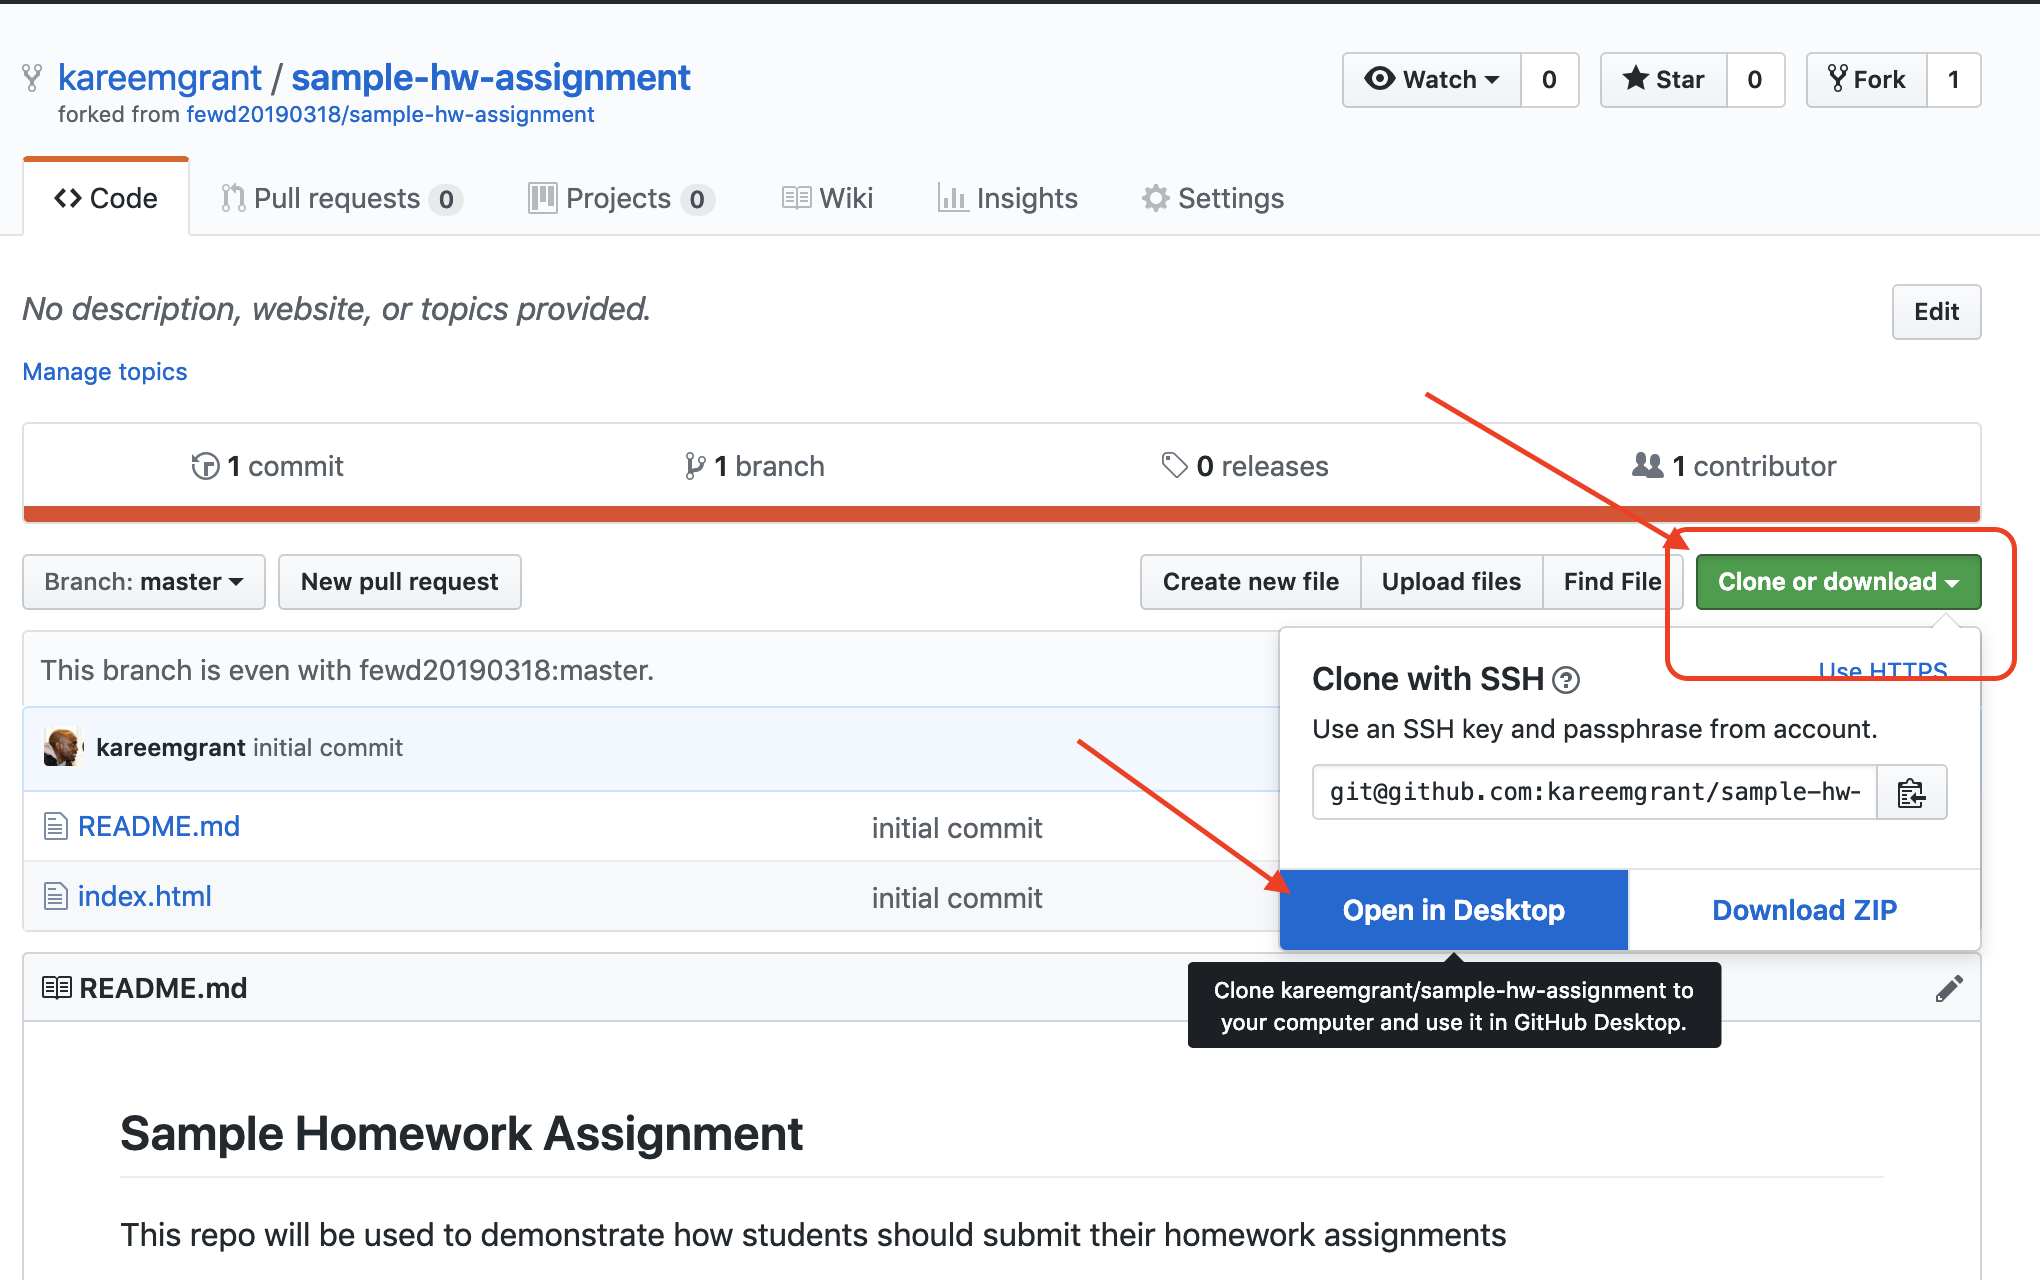
Step 7: Clone the forked repository
Clone the repository by pressing on the button labeled Clone or download and then press the button labeled Open in Desktop. This action will open the Github Desktop application located on your computer.
Step 8: Place the cloned repo into your FEWD/github folder
While in Github Desktop navigate to your github folder located inside your FEWD folder (see Step 1)
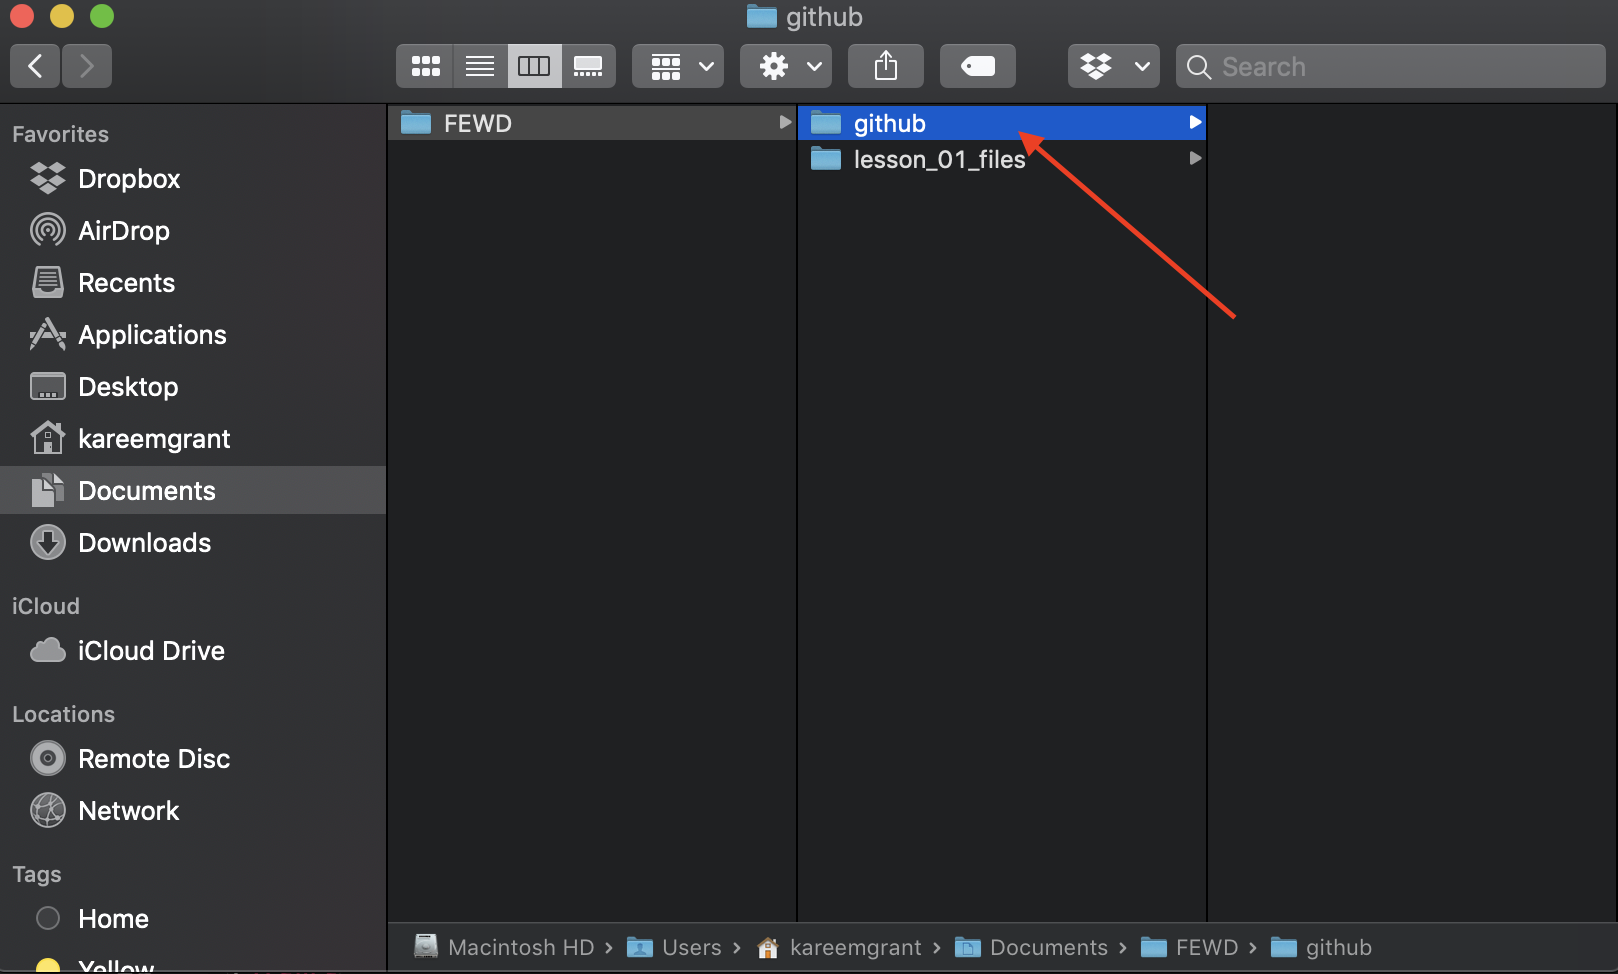
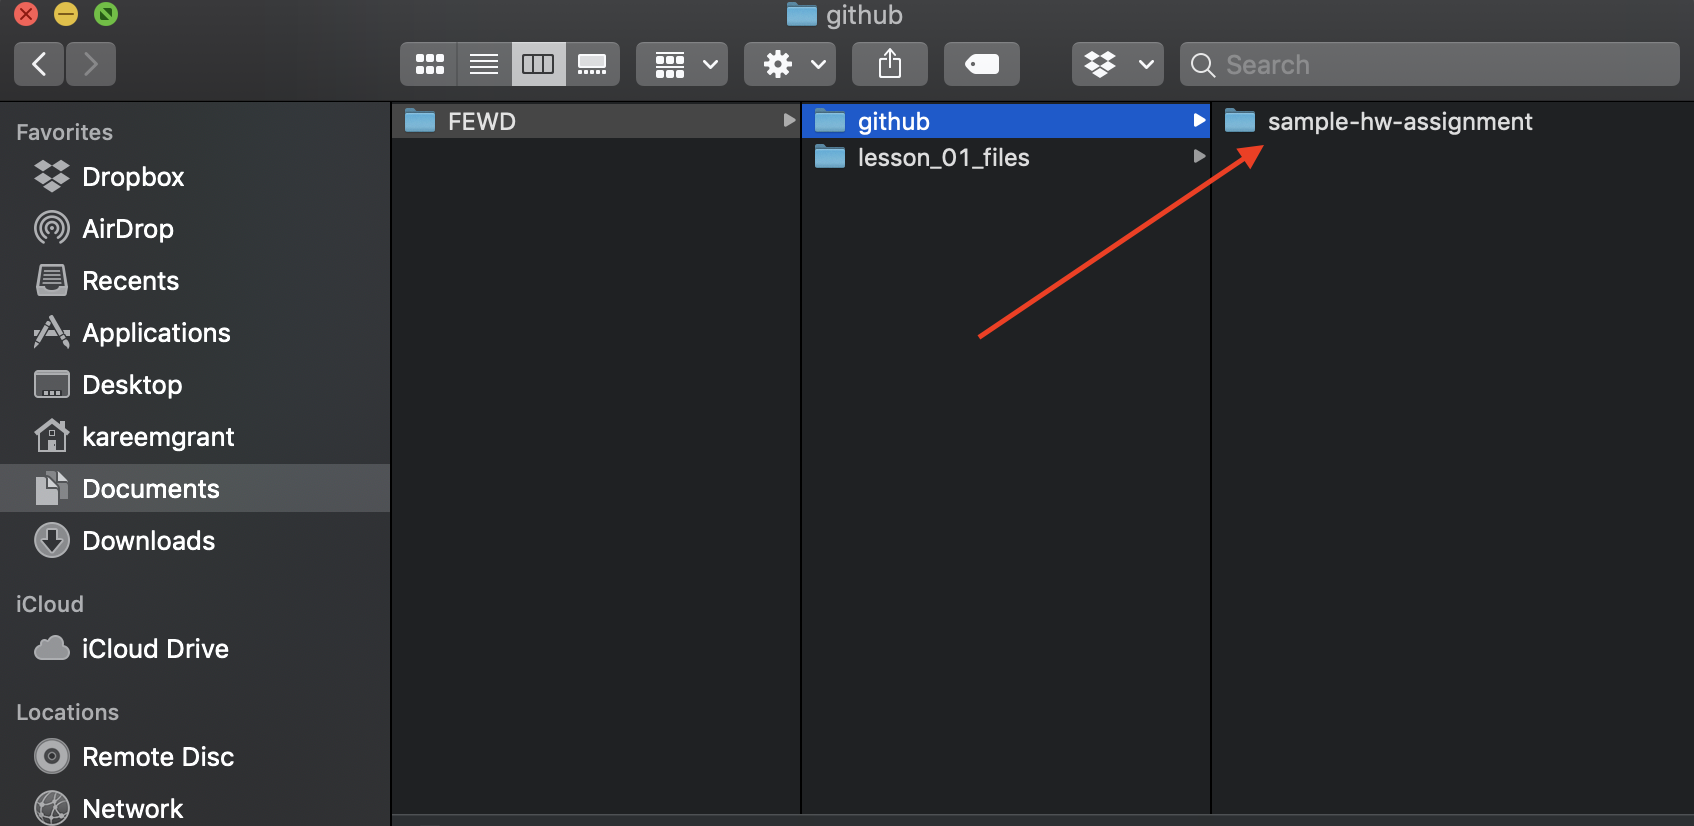
Step 9: Confirm clone was successfully placed in your FEWD/github folder
On your computer, navigate to your FEWD/github folder and confirm the existences of a folder that has name that matches the name of your remote repository
Working on your assignment
If you’ve made it this far you have successfully cloned your assignment repository and now you’re ready to start coding! Going forward, all of your work on this particular assignment will live in your FEWD/github/{name-of-your-assignment-repository} folder
Step 10: Open the repository folder in your text editor
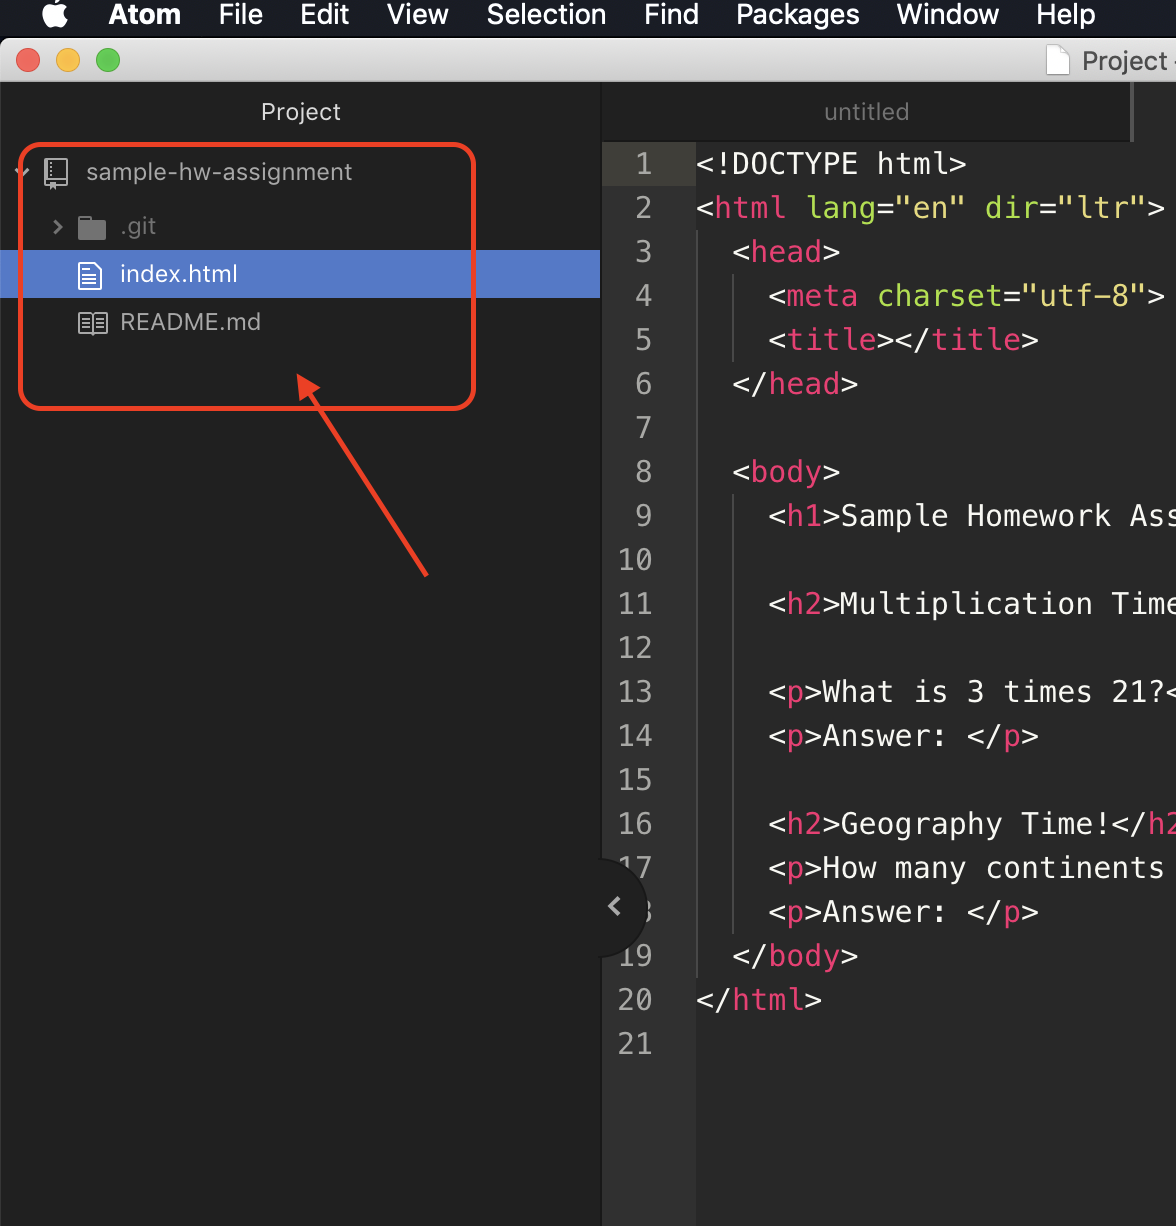
Using Atom, open the project folder for your assignment repository (FEWD/github/{name-of-your-assignment-repository})
You should always open the top-level folder for your project with your text editor (Atom) and not individually project files. This will help you stay organized and help you keep your sanity.
One way to confirm that you’ve opened the “top-level” folder of a project is to confirm that you can see only one project and all of its child files/folders in the Tree View located in the left pane. Use cmd + \ (mac) or ctrl+\ (pc) to toggle the Tree View
Step 11: Work on your assignment
You are going to work on your assignment the way your normally would. Ensuring that you constantly save your work (cmd+s - mac / ctrl+s - pc ) along the way.
(Git) Commit your work
While you work on your assignment it is highly recommended that you periodically Commit your code.
Committing is Git’s way of saving the history of the changes you’ve made on the assignment (much like the “Track Changes” feature of word processors). A commit takes a “snapshot” of your project’s entire codebase. This is extremely powerful as it allows you to “time travel” throughout your code.
It is a best practice to commit your code once you’ve finished a “unit” of work.
If you approach your assignments by breaking them up in parts or tasks, then a unit would represent that task.
For example: If you were tasked with building a portfolio site for a client the project could be broken into a series of small tasks such as:
implement design layout
add css styles
add portfolio images
etc
If you were using git, it would be a best practice to have a commit for each one of the tasks above.
Why? Because if something breaks and is beyond repair, you can easily revert to a past commit that you know works.
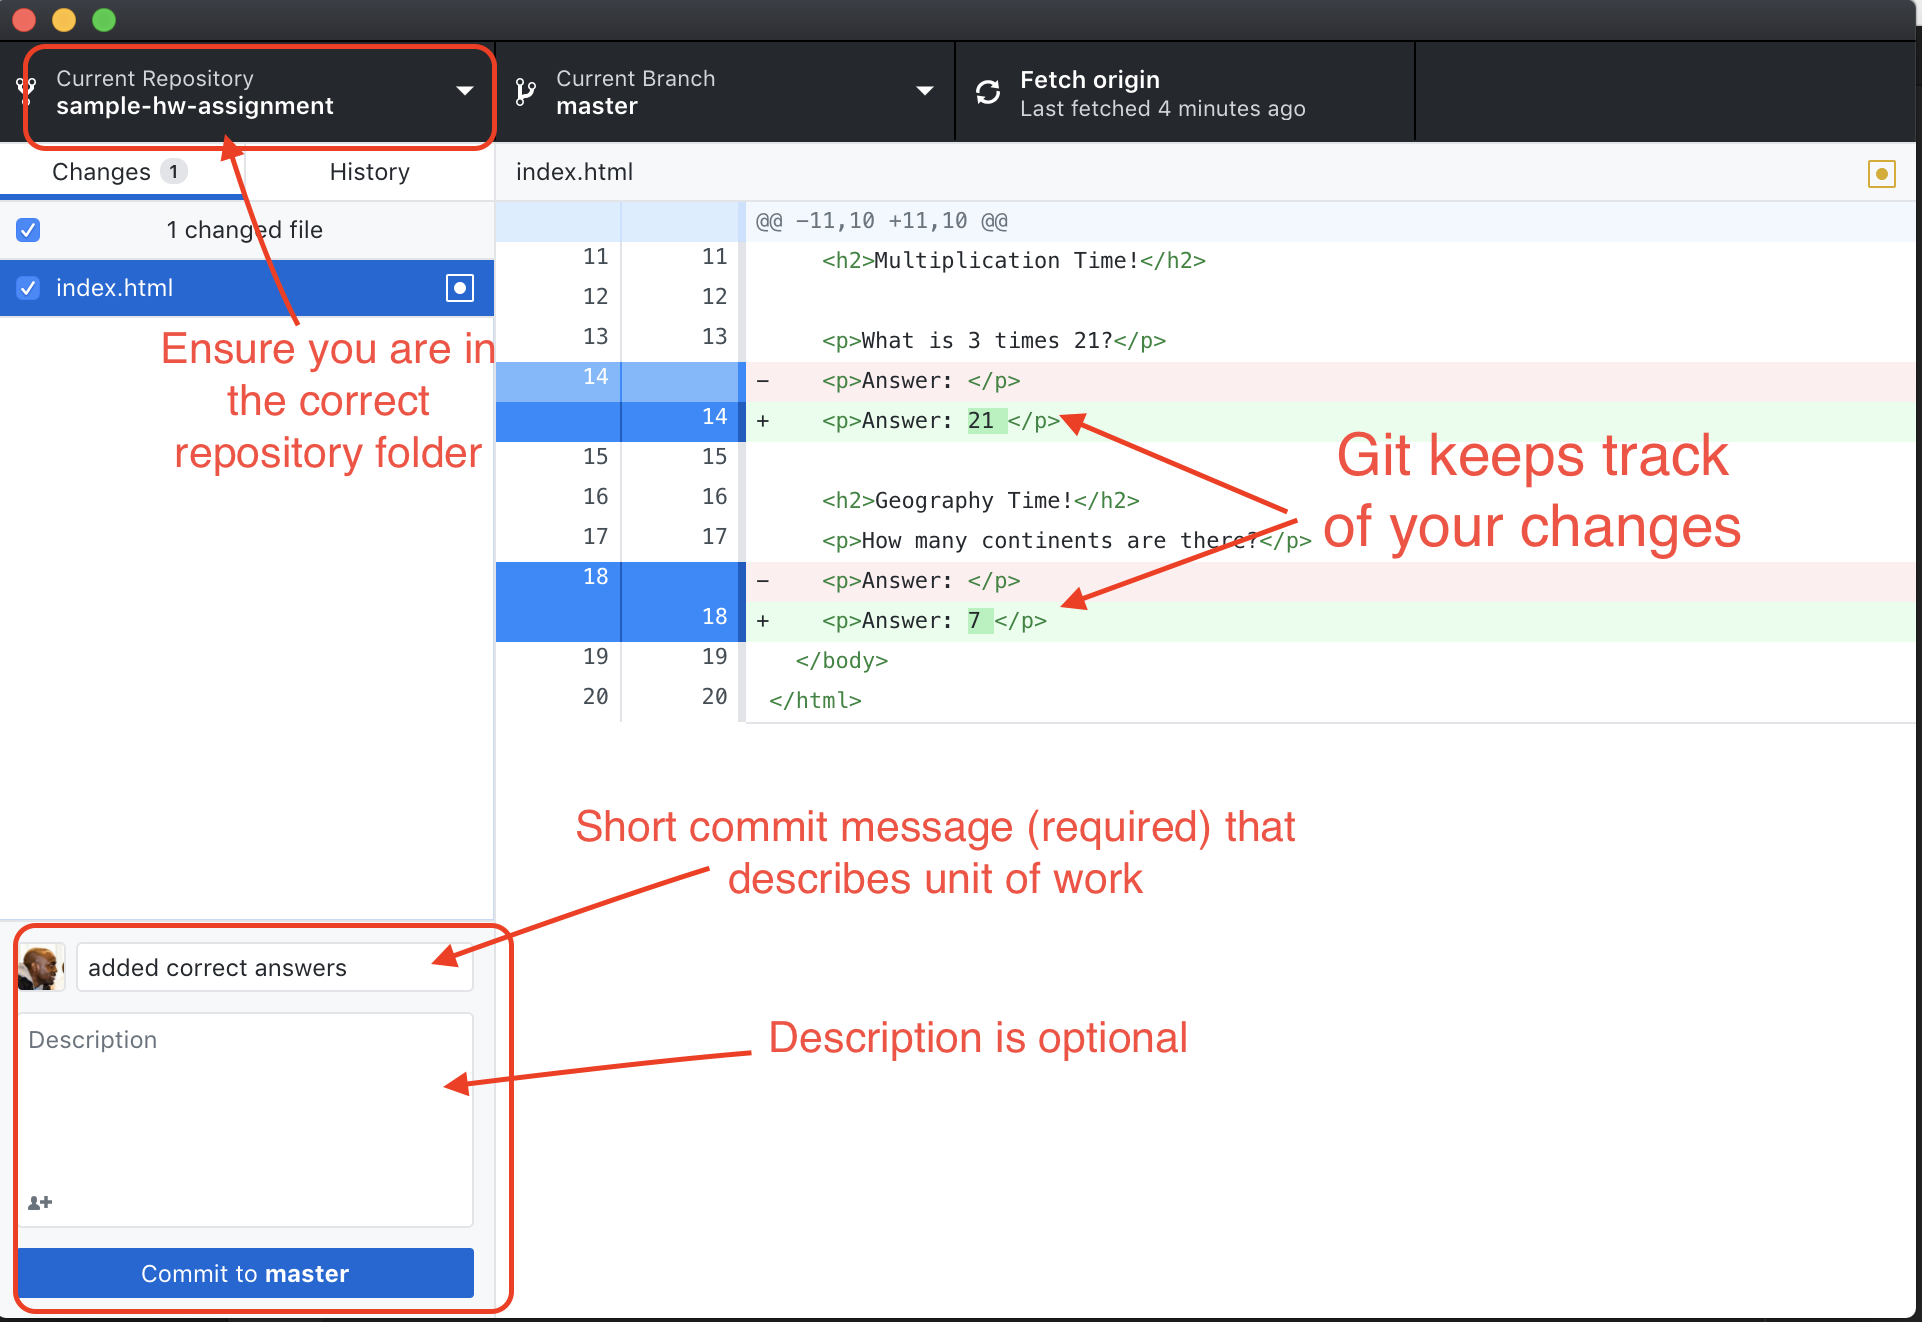
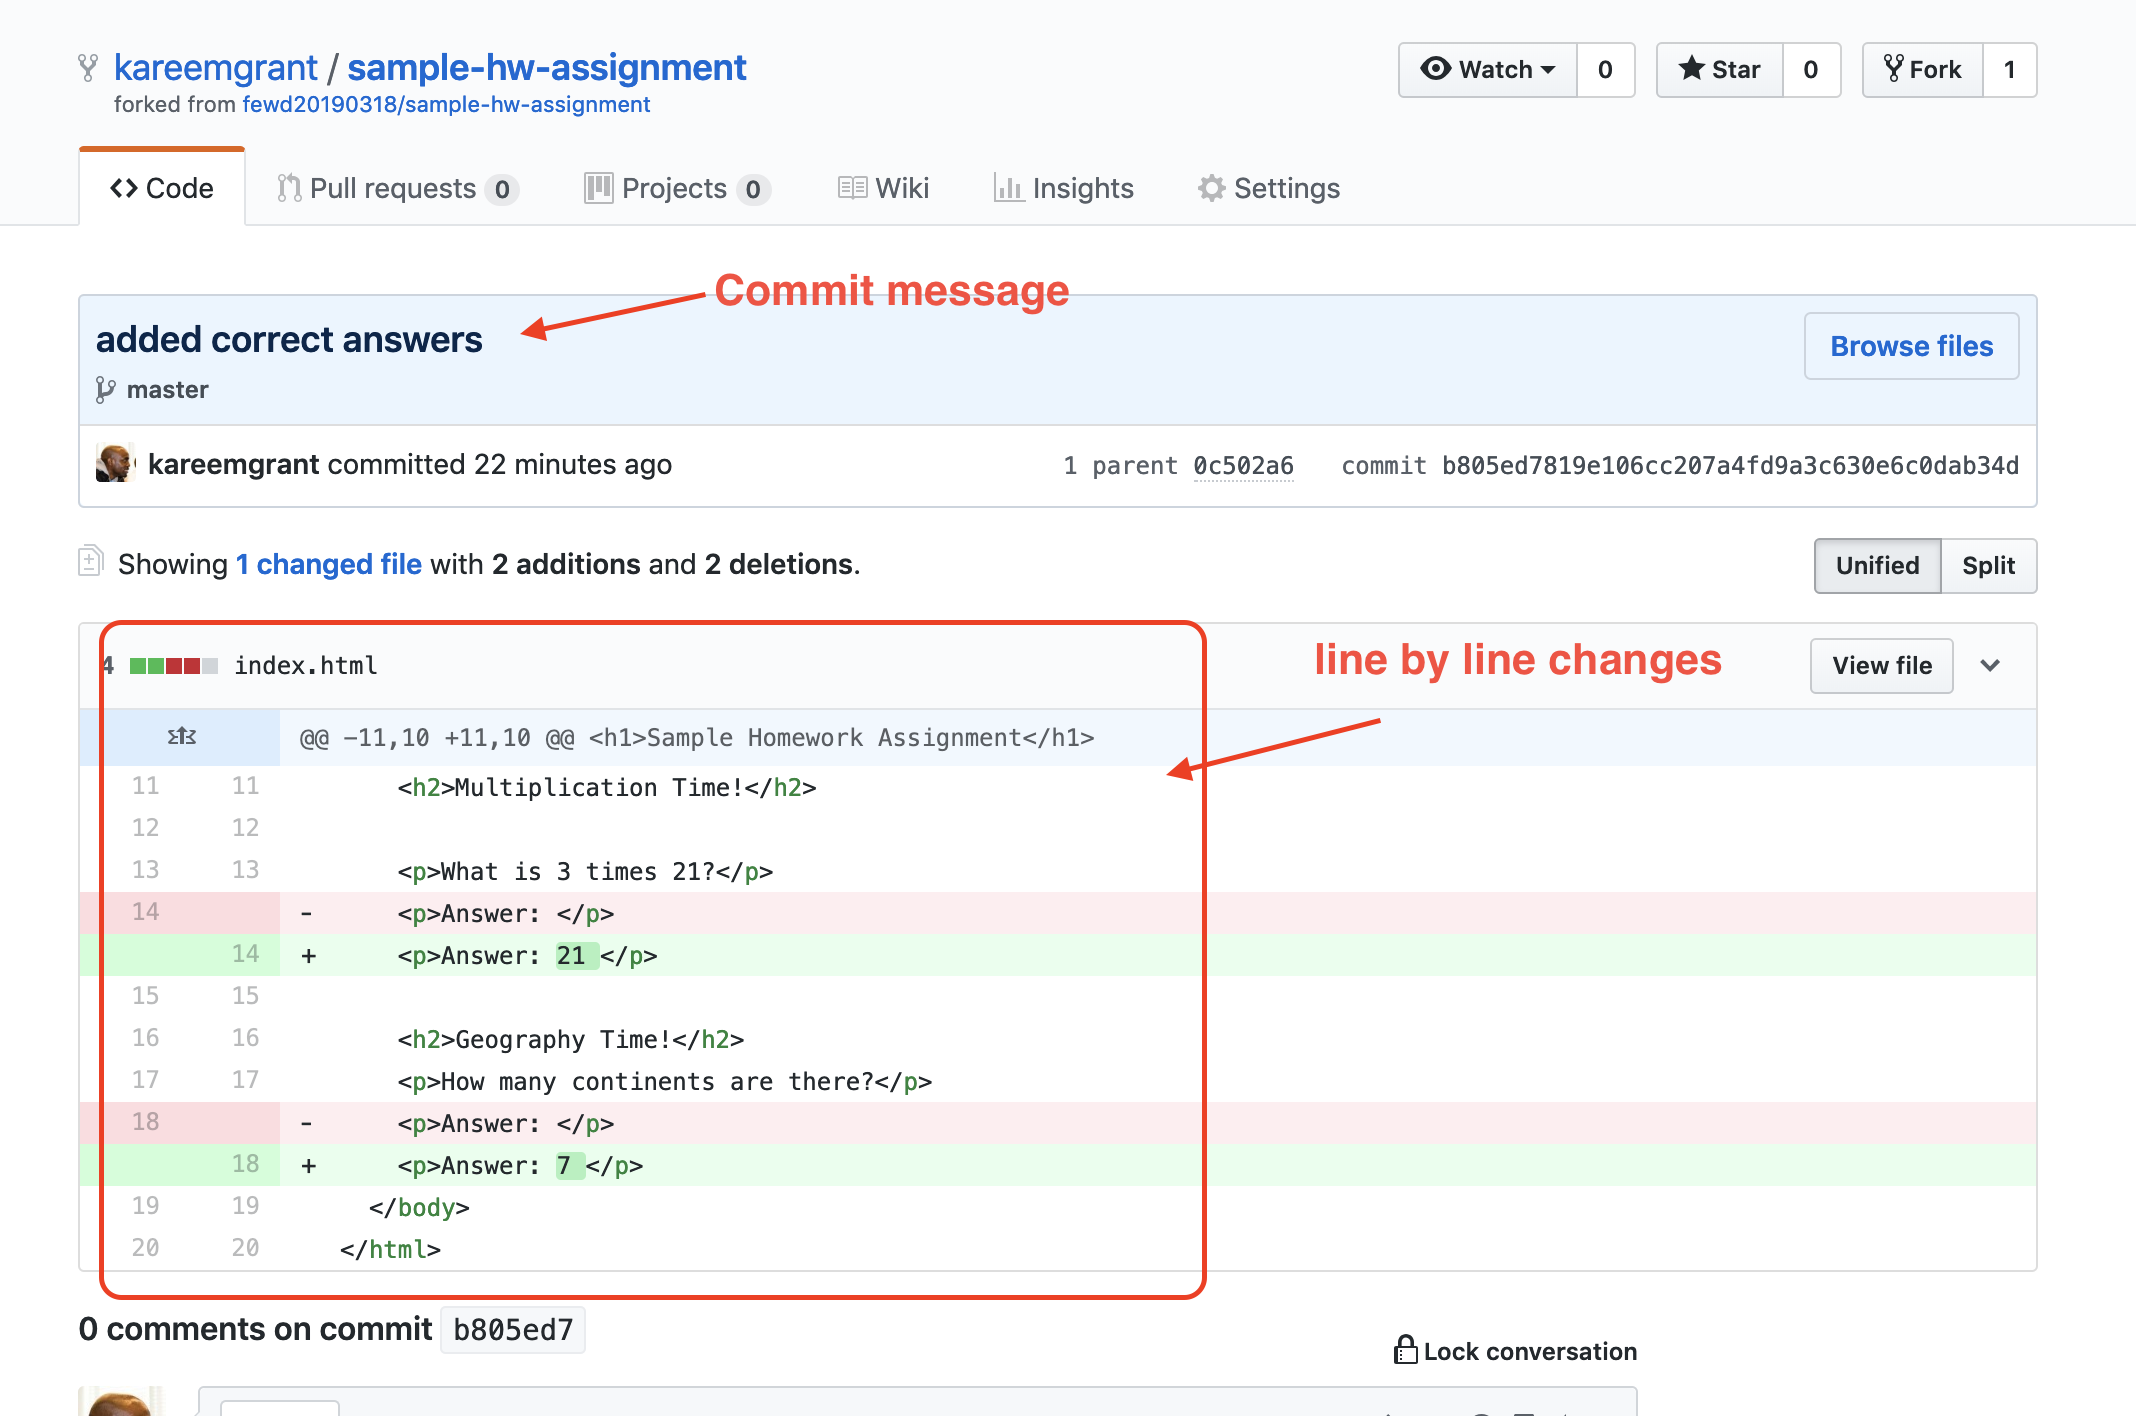
Git requires that you submit a message with each commit. This message is used to communicate the unit of work that was done.
Step 12: Make a commit using Github Desktop
After you’ve made changes associated with a “unit” of work, you’re ready to commit.
Open Github Desktop and ensure that you have selected the correct project (in Github Desktop)
After you commit you can go back to working on your “next unit of work” or step.
You aren’t required to take this approach of breaking up your assignment into tasks (or units of work) but it is highly recommended.
(Git) Push your work to Github to keep your work synced
You have been committing your code periodically and now you’d like to see your changes reflected on Github.com (i.e. the remote repository). However, after navigating to remote repository on Github.com you find that none of your recent changes are being reflected.
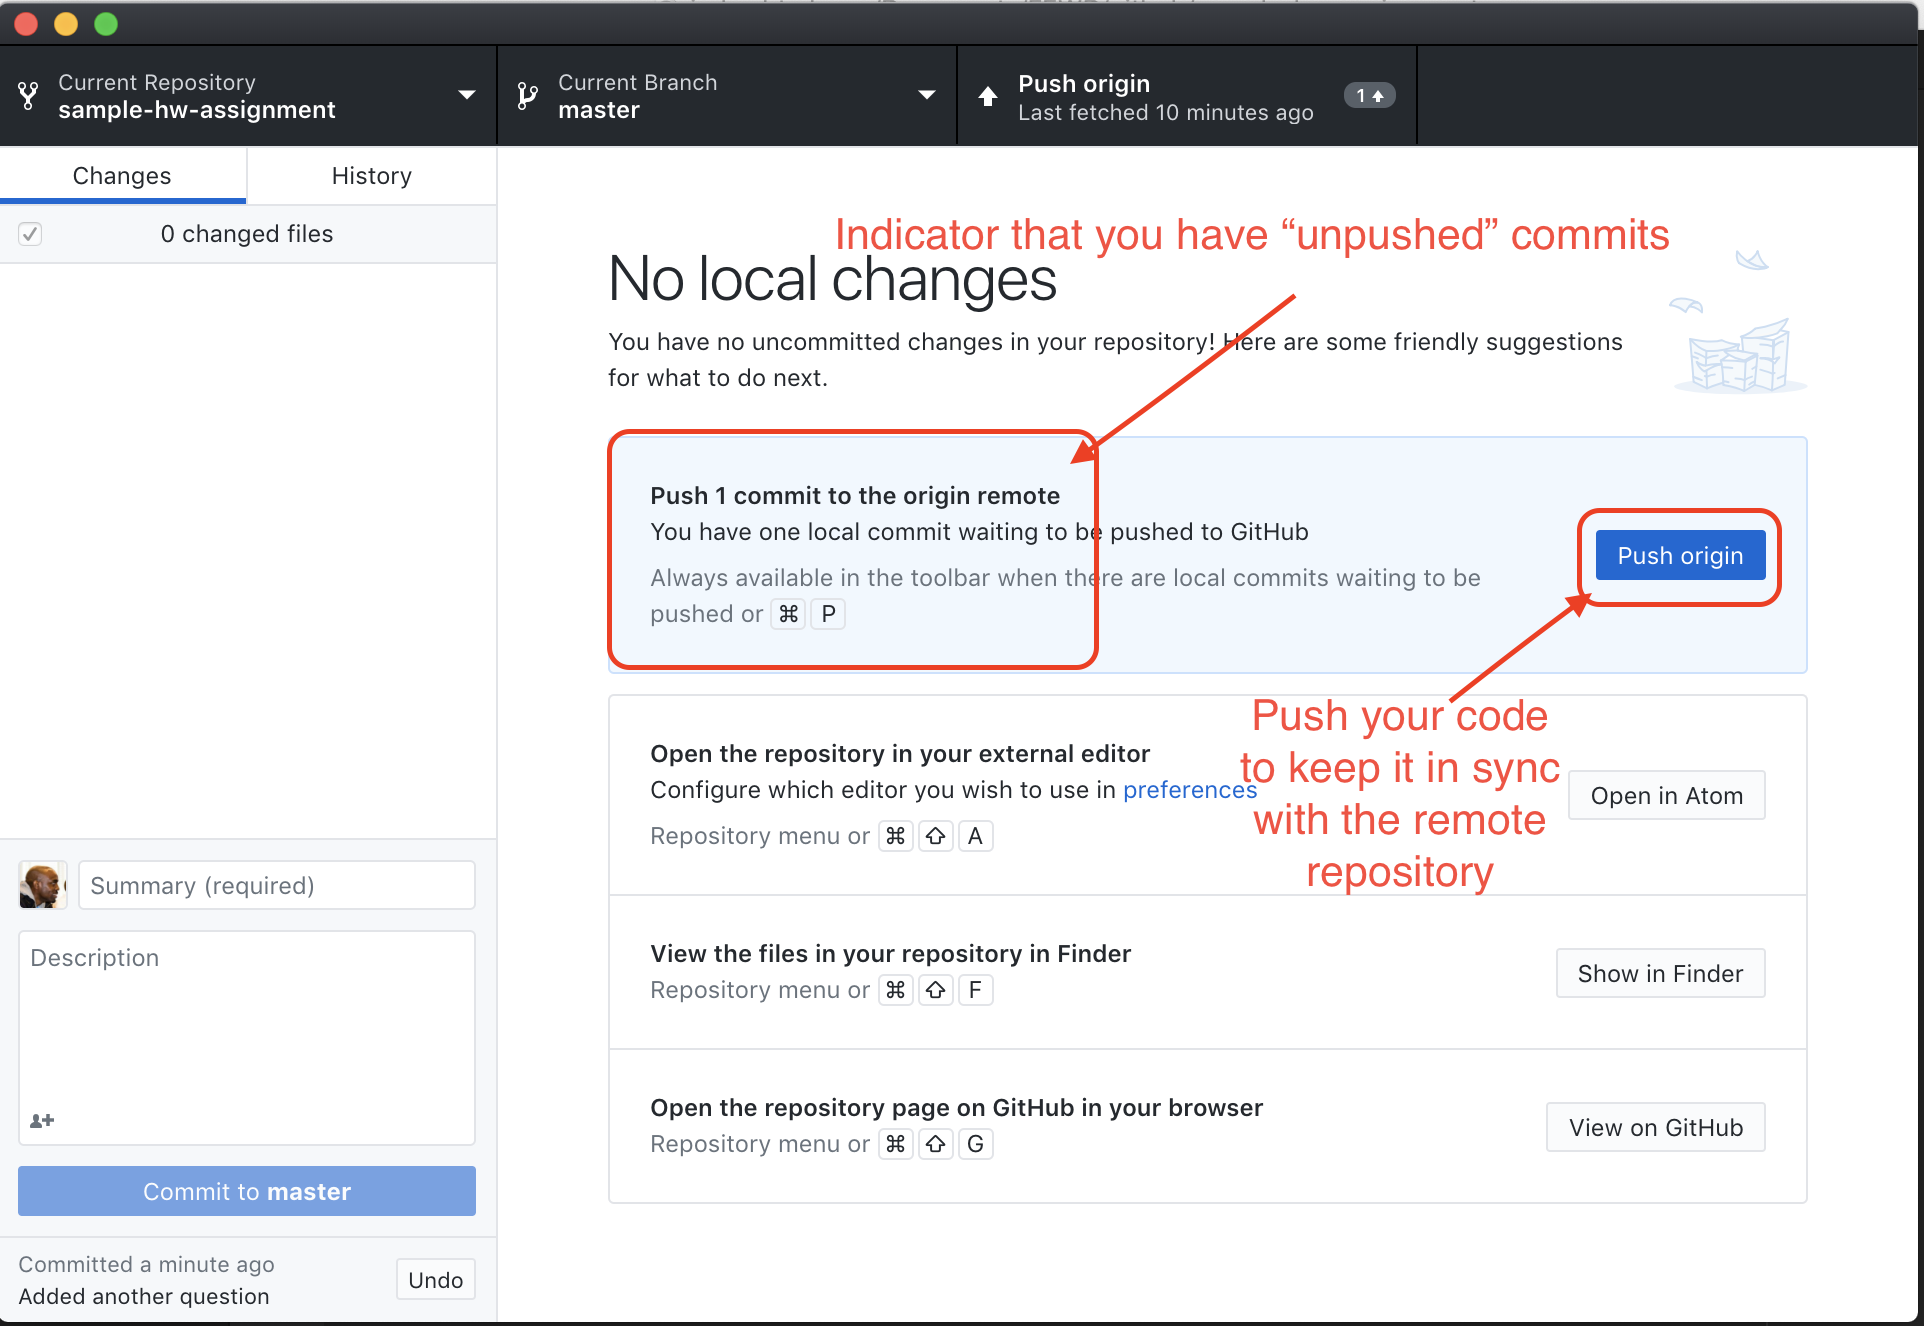
The reason you don’t see anything is because you haven’t pushed your code back up to the remote repository on Github. Pushing your code keeps your local repository and its associated remote repository in sync.
Step 13: Push your code back to the remote repository on Github.com
In Github Desktop (after you have committed all your changes) press the button labeled Push Origin to push your changes to Github.
Step 14: Confirm your commits were successfully “pushed” back to Github.com
Navigate to remote repository for the assignment on Github.com (i.e. the assignment repository that is located under your Github account).
Confirm that the changes you made are displayed in the commit history of the remote repository.
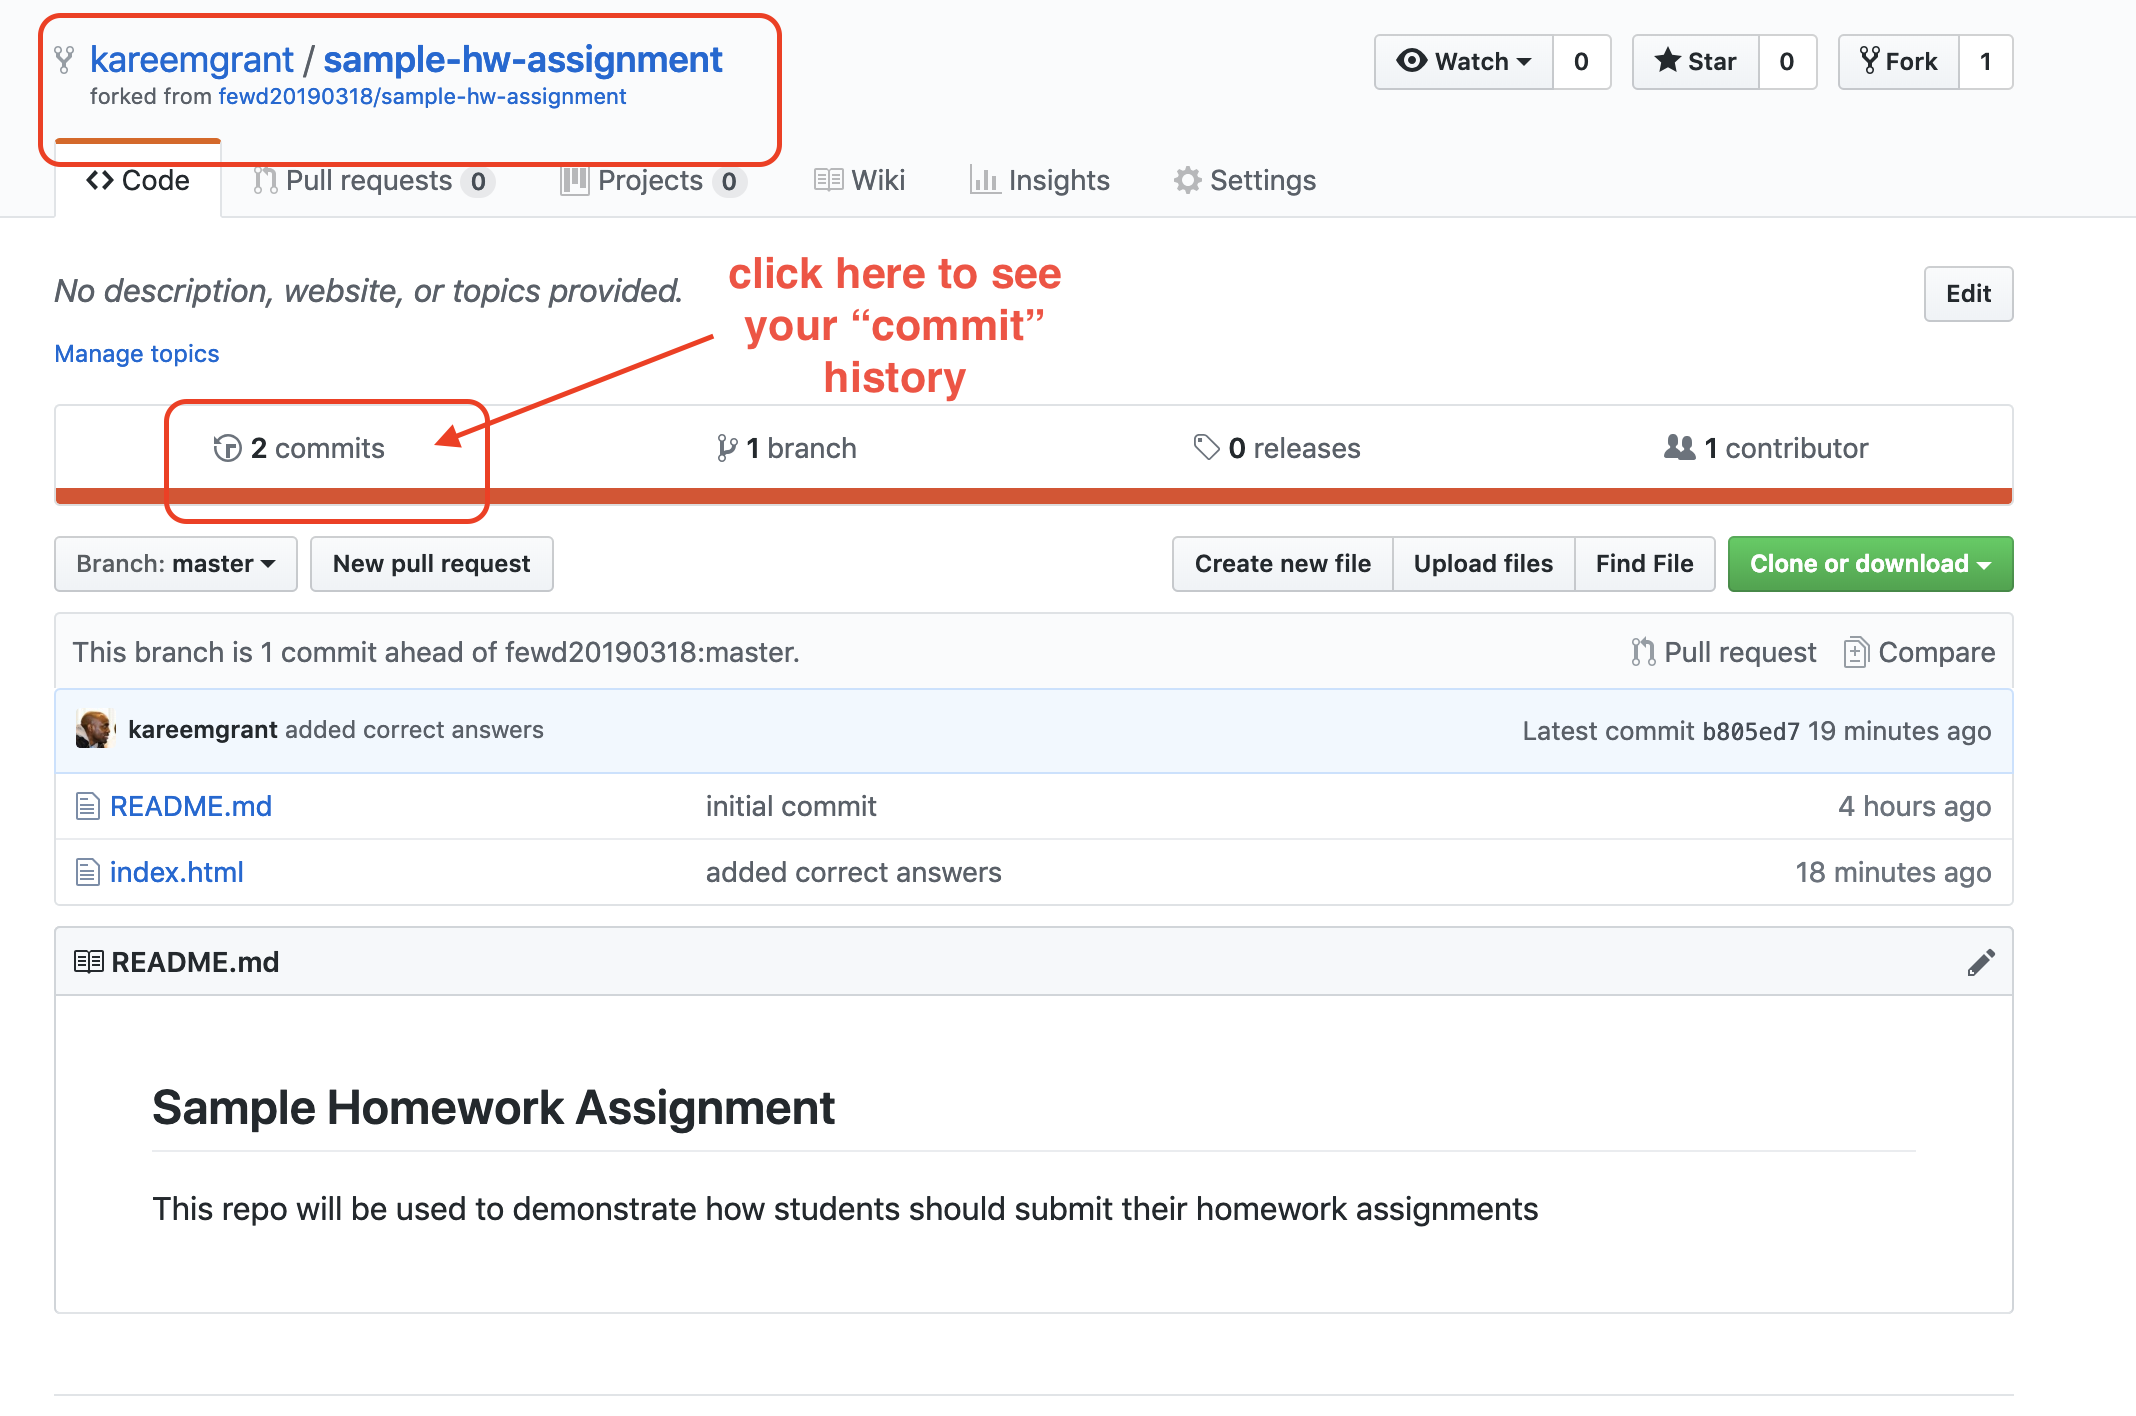
In this example we see that the changes made locally (on your computers) are now reflected (aka they were synced) with the associated remote repository!
Submit your homework by making a Pull Request
You’ve made all our commits and you’ve finished the assignment. Now you are ready to submit your homework for feedback.
Step 15: Make a pull request
While in your repository press the link labeled Pull requests to submit your homework. See gif below for more information.
Press the green button labeled New pull request
- You will be taken to the “Open a pull request” screen that contains some dropdowns, these dropdowns do not need to be changed.
Then press the green button labeled Create pull request
In the title field of the pull request, name your pull request using the following format: HW Submission by [Your Full Name]
Finally, press the green button labeled Create pull request to complete the process of submitting your homework
See the example below: