Working with Visual Studio CodeThemes
Changing Themes
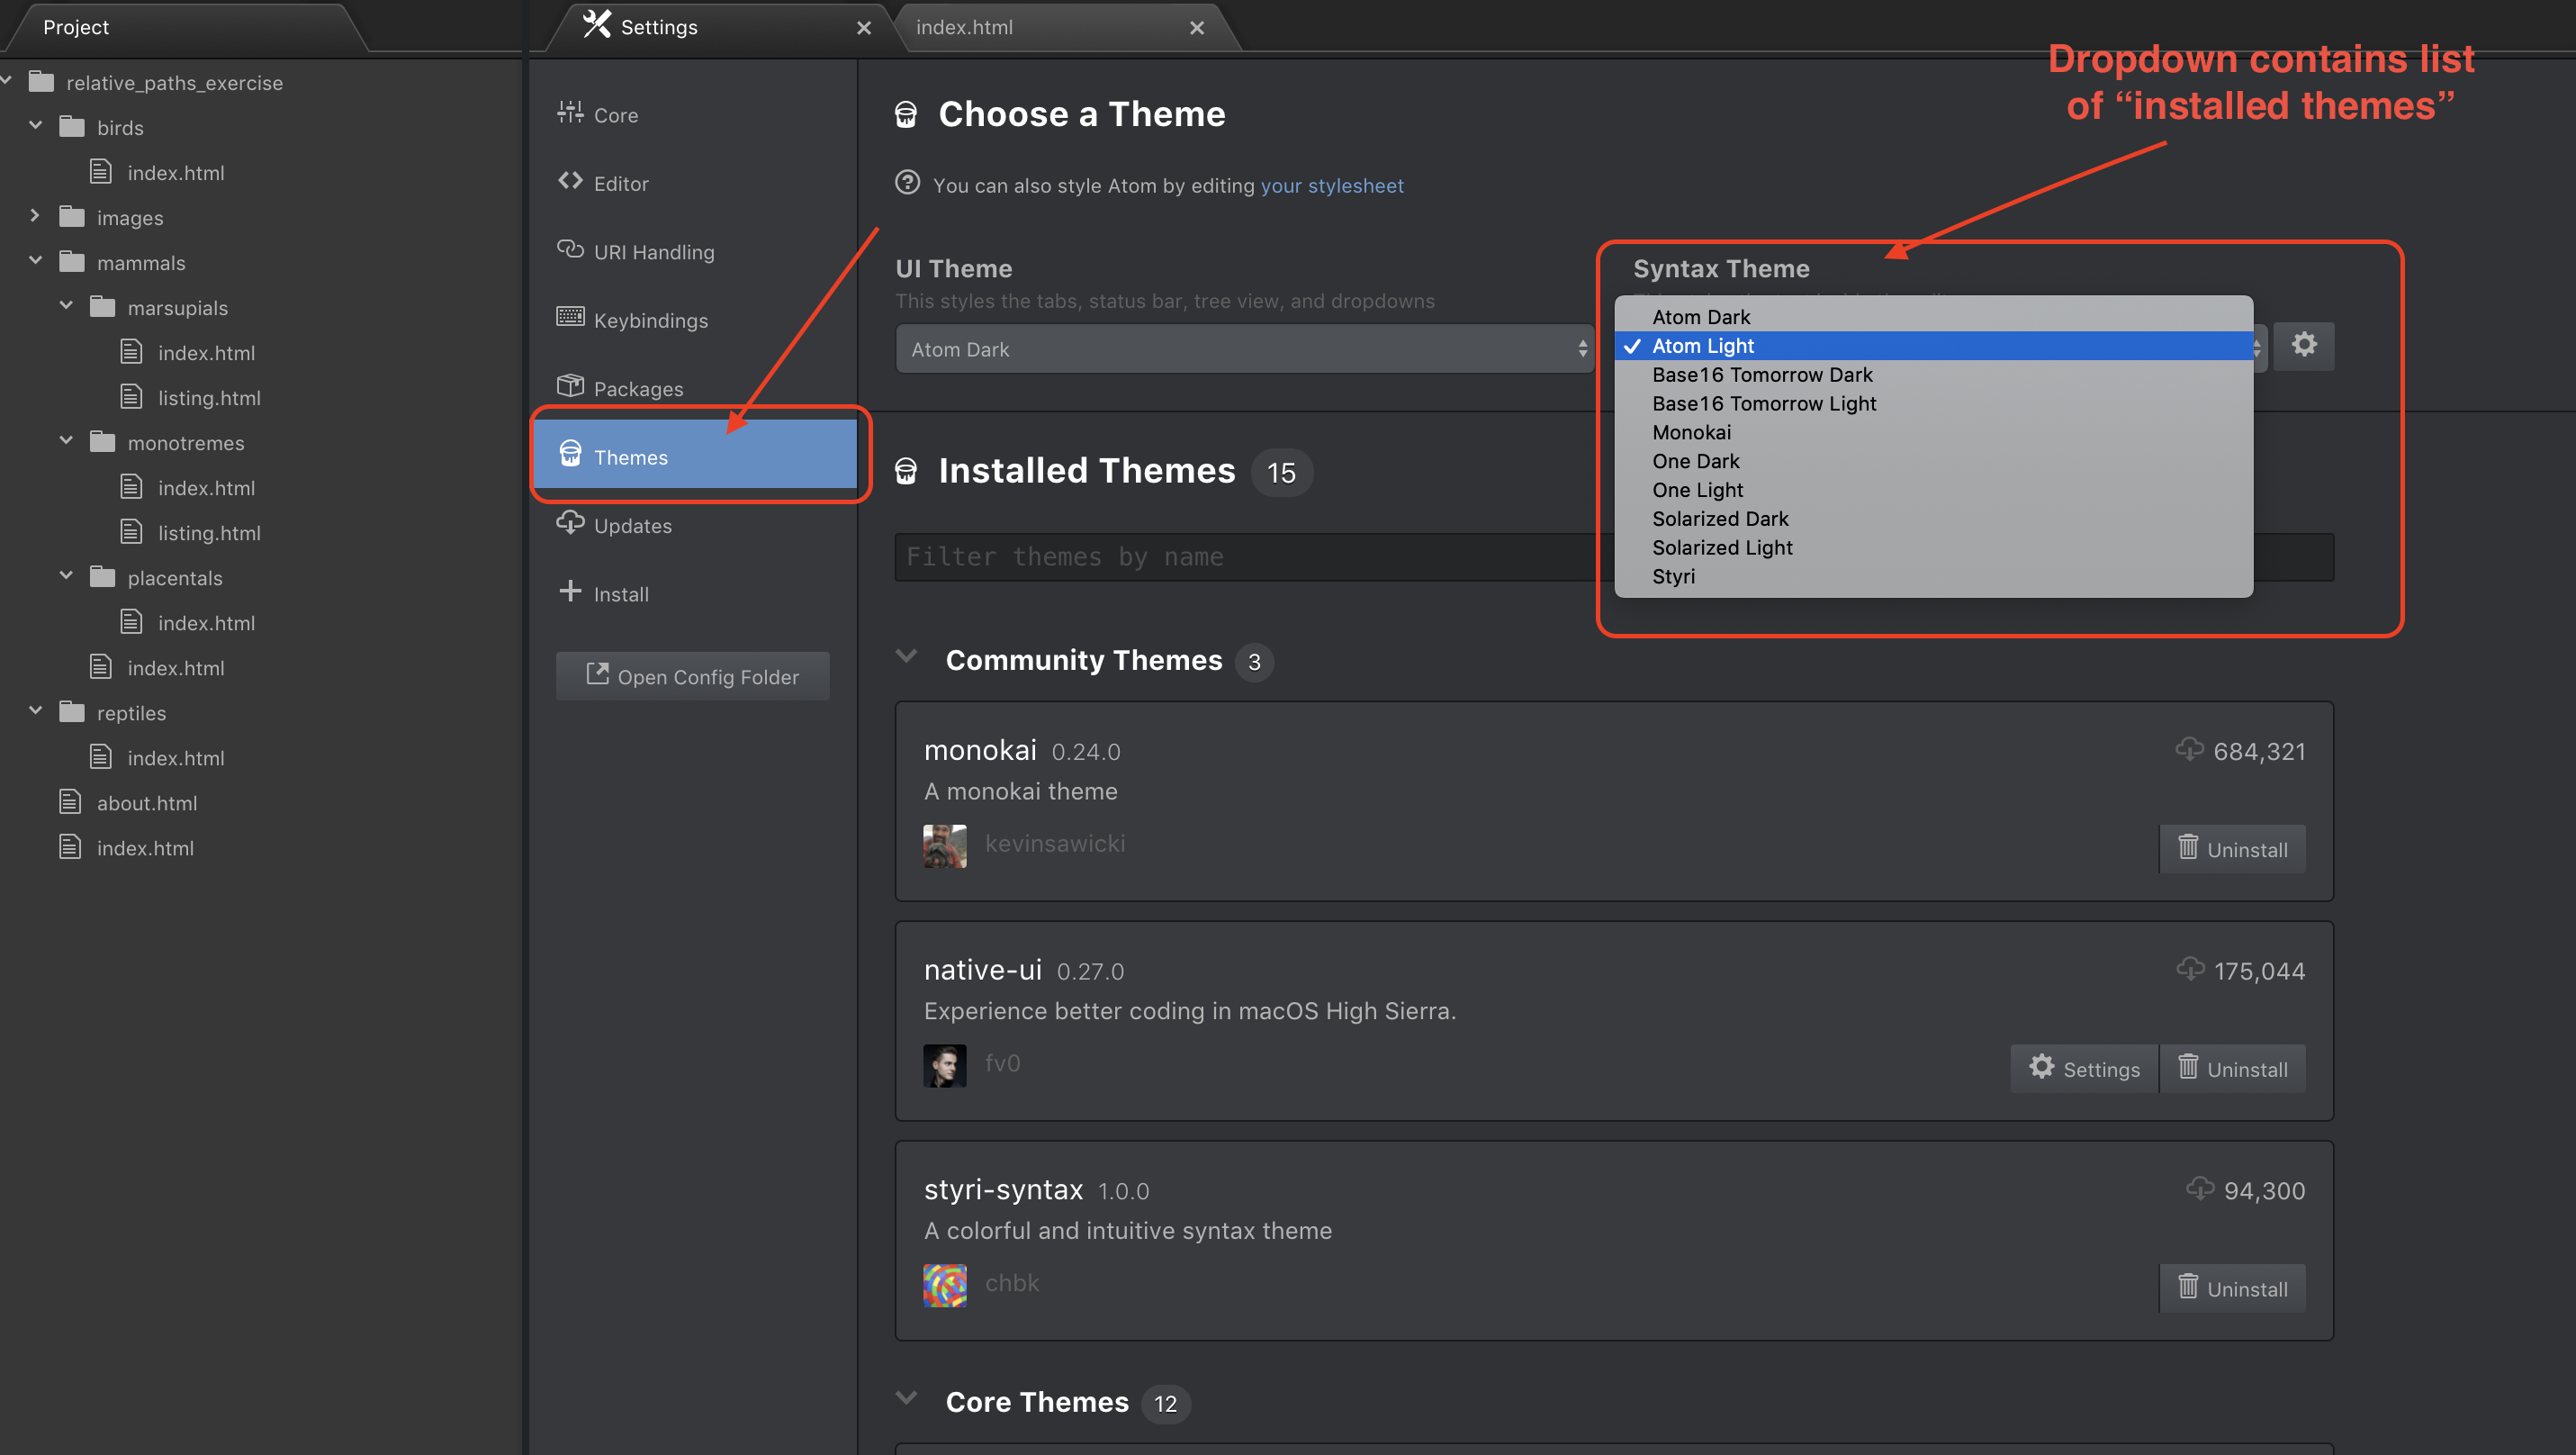
Atom allows you to easily switch between your installed themes by doing the following:
- Opening Visual Studio CodeSettings (mac:
cmd + ,| pc:ctrl + ,) - Select Themes in the left-hand menu
- Select the dropdown menu labeled Syntax Themes
- Choose one of the installed themes listed in the dropdown menu
Atom comes pre-installed with a set of themes. See that section below to add new themes to Atom
Installing New Themes
Atom allows you to install themes created by developers who participate in Atom’s vibrant community. VS Code has a dedication section on their official site for the discovery of these themes (VS Code Themes)
Here are steps involved in adding a new VS Code theme:
- Visit https://code.visualstudio.com/docs/getstarted/themes
- Find a theme that you’d like to install
- Press the install button on the theme’s page
- An alert will be displayed asking you if you would like to open VS Code - select the option labeled Open VS Code
- While in VS Code Settings, press the button labeled Install to install the new theme
- Select Themes in the left-hand menu of VS Code Settings
- Select the dropdown menu labeled Syntax Themes
- Select the newly installed theme from the dropdown menu to apply the new theme to Atom
Here’s an example of the installation of an Visual Studio Codetheme named Atom Material
